Installing and Configuring Subversion on CentOS
This document explains how to install, configure, and use subversion with apache on centos 5.8
[root@svn ~]# cat /etc/redhat-release
CentOS release 5.8 (Final)
[root@svn ~]# uname -r
2.6.18-308.el5
Step1)Installation:
Install subversion using yum.
[root@svn ~]# yum install mod_dav_svn subversion
[root@svn ~]# yum install httpd
Now configure apache.
update /etc/httpd/conf/httpd.conf with ServerName.
#
# ServerName gives the name and port that the server uses to identify itself.
# This can often be determined automatically, but we recommend you specify
# it explicitly to prevent problems during startup.
#
# If this is not set to valid DNS name for your host, server-generated
# redirections will not work. See also the UseCanonicalName directive.
#
# If your host doesn’t have a registered DNS name, enter its IP address here.
# You will have to access it by its address anyway, and this will make
# redirections work in a sensible way.
#
ServerName 192.168.2.99:80
[root@svn ~]# service httpd start
Starting httpd: [ OK ]
[root@svn ~]# chkconfig httpd on
The next step is to setup some settings within Apache so Subversion and Apache work together.
[root@svn conf.d]# cd /etc/httpd/conf.d/
update subversion.conf file like below based on your environment.
<Location /repos>
DAV svn
SVNPath /svn/repos
#
# # Limit write permission to list of valid users.
# <LimitExcept GET PROPFIND OPTIONS REPORT>
# # Require SSL connection for password protection.
# # SSLRequireSSL
#
AuthType Basic
AuthName “Subversion repos”
AuthUserFile /etc/svn-auth-conf
Require valid-user
# </LimitExcept>
</Location>
****************
Now we need to configure password for the file specified in subversion.conf file.
htpasswd -cm /etc/svn-auth-conf username
[root@svn ~]# htpasswd -cm /etc/svn-auth-conf ukatru
New password:
Re-type new password:
Adding password for user ukatru
Configure repository:
[root@svn conf.d]# cd /svn
[root@svn svn]# svnadmin create repos
[root@svn svn]# chown -R apache:apache /svn
[root@svn svn]# service httpd restart
Thanks
Infosphere Information Server DataStage Change Data Capture
In this article I will explain where we use change data capture stage in the datastage developemt.
Requirement:
We are getting a file from source system every day and they are extracting everything and sending it to our datastage server.We need to process only new records becuase source is sending everything.
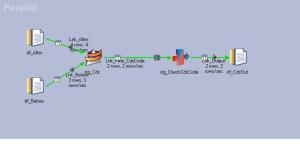
Day1:We received a file cdc_after.dat which contains all data from source.In Day1 we have zero records in our cdc_before.dat, so when we run our job it will produce all records becuase all are new.
Day2:We received cdc_after.dat file with 5 records and we need to process edit,insert rows only.(source will never drop already sent records from cdc_after file–interface agreement)
Always after data becomes beforedata next day.
The stage assumes that the incoming data is key-partitioned and sorted in ascending order. The columns
the data is hashed on should be the key columns used for the data compare. You can achieve the sorting
and partitioning using the Sort stage or by using the built-in sorting and partitioning abilities of the
Change Capture stage.
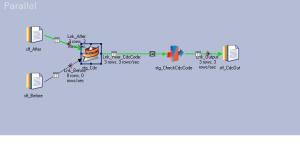
Job1:
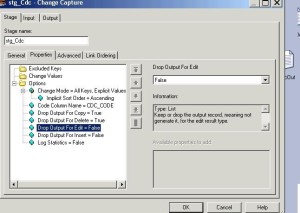
Configuring CDC stage to get only new records.
In the above CDC configuration the main option we use is Change Mode.
In this scenario we are using All Keys,Explicit Values.
All Keys,Explicit Values:In this mode we don’t need to specify key columns.
We need only newly inserted or edited record and hence we set Drop output for insert = FALSE,Drop Output for Edit = FALSE and the remaning all three are set to FALSE becuase we don’t want copy,edit or delete records.
Note:Always make sure the link ordering is corrected otherwise you will get wrong results.
We need to configure Code Column Name in the options tab:
Copy code
Allows you to specify an alternative value for the code that indicates the after record is a copy of the
before record. By default this code is 0.
Deleted code
Allows you to specify an alternative value for the code that indicates that a record in the before set has
been deleted from the after set. By default this code is 2.
Edit code
Allows you to specify an alternative value for the code that indicates the after record is an edited version
of the before record. By default this code is 3.
Insert Code
Allows you to specify an alternative value for the code that indicates a new record has been inserted in
the after set that did not exist in the before set. By default this code is 1.
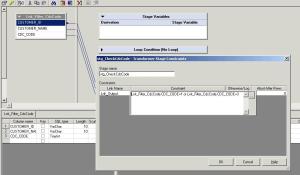
In the transformer stage we will create a constraint to filter new records like below.
Run the job:
Day1:
cat cdc_after.dat
CUSTOMER_ID,CUSTOMER_NAME
1,UMA
2,MADHU
3,KATRU
cat cdc_before.dat
Output:
CUSTOMER_ID,CUSTOMER_NAME,change_code
1,UMA,1
2,MADHU,1
3,KATRU,1
Day2:
cat cdc_after.dat
CUSTOMER_ID,CUSTOMER_NAME
1,UMA
2,MADHU
3,KATRU1
4,MAHI
cat cdc_before.dat
CUSTOMER_ID,CUSTOMER_NAME
1,UMA
2,MADHU
3,KATRU
Run Job:
cat cdc_output.dat
CUSTOMER_ID,CUSTOMER_NAME,change_code
3,KATRU1,1
4,MAHI,1
Thanks
Uma
Surrogate Key Generator stage — Infosphere Information Server 8.5
The Surrogate Key Generator stage is a processing stage that generates surrogate key columns and maintains the key source.
A surrogate key is a unique primary key that is not derived from the data that it represents, therefore changes to the data will not change the primary key. In a star schema database, surrogate keys are used to join a fact table to a dimension table.
surrogate key generator stage uses:
- Create or delete the key source before other jobs run
- Update a state file with a range of key values
- Generate surrogate key columns and pass them to the next stage in the job
- View the contents of the state file
Generated keys are 64 bit integers and the key source can be stat file or database sequence.
Creating the key source
Drag the surrogate key stage from palette to parallel job canvas with no input and output links.
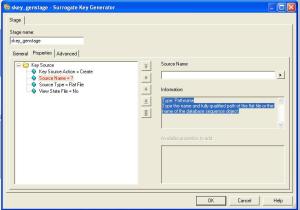
Double click on the surrogate key stage and click on properties tab.
Properties:
Key Source Action = create
Source Type : FlatFile or Database sequence(in this case we are using FlatFile)
When you run the job it will create an empty file.
If you want to the check the content change the View Stat File = YES and check the job log for details.
skey_genstage,0: State file /tmp/skeycutomerdim.stat is empty.
if you try to create the same file again job will abort with the following error.
skey_genstage,0: Unable to create state file /tmp/skeycutomerdim.stat: File exists.
Deleting the key source:
Updating the stat File:
To update the stat file add surrogate key stage to the job with single input link from other stage.
We use this process to update the stat file if it is corrupted or deleted.
1)open the surrogate key stage editor and go to the properties tab.
If the stat file exists we can update otherwise we can create and update it.
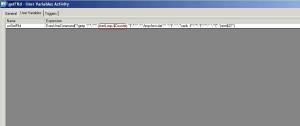
We are using SkeyValue parameter to update the stat file using transformer stage.
Generating Surrogate Keys:
Now we have created stat file and will generate keys using the stat key file.
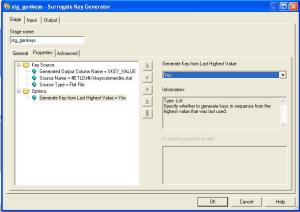
Click on the surrogate keys stage and go to properties add add type a name for the surrogate key column in the Generated Output Column Name property
Go to ouput and define the mapping like below.
Rowgen we are using 10 rows and hence when we run the job we see 10 skey values in the output.
I have updated the stat file with 100 and below is the output.
If you want to generate the key value from begining you can use following property in the surrogate key stage.
- If the key source is a flat file, specify how keys are generated:
- To generate keys in sequence from the highest value that was last used, set the Generate Key from Last Highest Value property to Yes. Any gaps in the key range are ignored.
- To specify a value to initialize the key source, add the File Initial Value property to the Options group, and specify the start value for key generation.
- To control the block size for key ranges, add the File Block Size property to the Options group, set this property toUser specified, and specify a value for the block size.
- If there is no input link, add the Number of Records property to the Options group, and specify how many records to generate.
Infosphere Information Server 8.7–Monitoring Datastage Jobs Operations console
Steps to configure Datastage operations console in 8.7
Step1)Creating the operations database schema
Creating the operations database schema for an Oracle database on a UNIX or Linux system
Database : oracle11g
cd $DSHOME/../DSODB/scripts/Oracle11g
./generate_ddl.sh
Checking required files….
Setting required parameters…
Usage: generate_ddl.sh <DSODBTableSpaceName> <DSODBDatafilePath>
Parameters:
<DSODBTableSpaceName>
Name of the operations database tablespace.
<DSODBDatafilePath>
Location where the tablespace data files will be created. It must be an
existing path. Do not add a trailing slash or backslash (/ or \).
Example: /u01/app/oracle/oradata/dbname
For example:
generate_ddl.sh dsodbspace /u01/app/oracle/oradata/dbname
./generate_ddl.sh DSODB_TBS ‘+DATA1’
Checking required files….
Setting required parameters…
Generating the SQL setup files…
Created file DSODB_setup.sql
Created file DSODB_setup_remove.sql
File generation complete
To complete the task please refer to Step B of the README file.
Step2:
To create the database schema and tables, and to grant the required privileges, enter the command:
sqlplus <oracle_system_user/oracle_system_password@database_service_name>
@DSODB_setup.sql <dsodbpassword>
example, enter this command:
sqlplus sys/*****@UISDV1 @DSODB_setup.sql password
Step3)Configuring the connection
The connection parameters are set in the DSODBConnect.cfg configuration file which is stored in the $DSHOME/../DSODB directory in the installation directory
sample config file for oracle database:
# Licensed Materials – Property of IBM
# Copyright IBM Corp. 2011
# DataStage Operations Database Connection Definition for Oracle
# ==============================================================
# The following parameters define the connection to the Operations Database.
# “DBTYPE” must be set to identify which database manager is in use.
# This file is for Oracle. For DB2 and SQL Server databases, copy the file
# ./scripts/DB2_LUW_9_X/DSODBConnect.cfg or ./scripts/SQLServer200X/DSODBConnect.cfg
# into the DSODB directory, then edit it as appropriate.
DBTYPE=ORACLE
# “Driver” is the Java class name for the JDBC driver to be used.
# (The following example is for a connection using the Information Server branded driver.)
Driver=com.ibm.isf.jdbc.oracle.OracleDriver
# “JAR” specifies a jar file that is needed to run the driver.
# The file must be placed in the ASBNode/lib/java subdirectory of the
# InformationServer installation directory on this system unless a full path is specified.
# NOTE that a full path MUST use forward-slashes as separators EVEN ON A WINDOWS SYSTEM.
# The property may be repeated if more than one jar needs to be loaded.
# (The following example specifies the Information Server branded driver.)
JAR=ISoracle.jar
# “URL” is used to identify the database concerned.
# (The following example is for an Oracle database that holds the
# xmeta Information Server repository. Note the inclusion of a port number.)
URL=jdbc:ibm:oracle://localhost:1521;SID=xmeta
# The following specify the username and password to connect to the DSODB schema.
Username=xxxx
Password=xxxx
Modify the URL according to the environment.
Optionally, encrypt the Username, Password, or both parameters The values of one or both of these parameters can be stored in a strongly encrypted form.
/ASBNode/bin>./encrypt.sh
Enter the text to encrypt:
Enter the text again to confirm:
Dec 27, 2011 11:02:04 PM java.util.prefs.FileSystemPreferences$2 run
INFO: Created user preferences directory.
{iisenc}5cpVKdoBUIrd5w/NWkKuwg==
/Server/DSODB/bin>./DSAppWatcher.sh -test
Error: DSODB is turned OFF in the DSODBConfig.cfg file.
Checking Database Connection:
Successfully loaded the database driver.
Successfully connected to the database.
DB Schema version number: 1
Test Failed.
sample SODBConfig.cfg file:
# Licensed Materials – Property of IBM
# (c) Copyright IBM Corp. 2010, 2011
#
# DataStage Operations Database Monitor Configuration
# ===================================================
# Lines in this file are either comments, introduced by a # sign like this,
# or of the form “key=value”. Key lines may be commented out below. If this file is edited,
# the data collection system must be stopped and restarted before changes take effect.
# The following switches the whole data collection system on if set to 1, or off if 0.
# A setting of 0 cannot be overridden at project level –
# however individual projects can be switched off by setting this to 0
# in a copy of this file placed in the project’s directory.
DSODBON=0
# Job Log Events
# ==============
# Normally, all Fatal log messages, Control messages, and the first N Warning messages
# of a run will be captured, except as modified by the following settings.
# Note: The message severity is looked at AFTER any Message Handlers have been invoked,
# which may adjust it or even discard the message altogether.
# The following specifies how many warning messages are to be captured for each run.
# Unless overridden by a “must capture” setting below, after this many warning log
# messages have been turned into events any further warnings will not be sent to the ODB.
# Default is 10. The value is capped at 1000.
# MaxWarnings=10
Now we need to set DSODBON=1 and then test the setup again.
/Server/DSODB/bin>./DSAppWatcher.sh -test
DSODB is turned ON in the DSODBConfig.cfg file.
Link Monitoring is OFF.
Job Run Usage is ON.
Resource Monitoring is ON.
Checking Database Connection:
Successfully loaded the database driver.
Successfully connected to the database.
DB Schema version number: 1
Test Successful.
Server/DSODB/bin>./DSAppWatcher.sh
Usage: DSAppWatcher.sh -start [appname | all] | -stop [appname] | -status [ appname ] | -test
./DSAppWatcher.sh -start
AppWatcher:STARTED
EngMonApp:STARTING
ODBQueryApp:STARTING
ResMonApp:STARTING
Start the IBM InfoSphere™ DataStage® Operations Console.
Procedure
If you are using HTTP, enter this URL from a supported browser:
http://domain:port/ibm/iis/ds/console/login.html
where
domain is the name or IP address of your InfoSphere Information Server system
port is the port number your InfoSphere Information Server system is configured to use. The default port number for HTTP is 9080
If you are using HTTPS, enter this URL from a supported browser:
https://domain:port/ibm/iis/ds/console/login.html
where
domain is the name or IP address of your InfoSphere Information Server system
port is the port number your InfoSphere Information Server system is configured to use. The default port number for HTTPS is 9443
Configuring for an MPP or grid environment
a.Edit the RemoteShell.sh file in the /InformationServer/Server/PXEngine/DSResourceTracker/ directory.
#!/bin/sh
# Set to rsh / ssh as appropriate
ssh “$@”
Configuration options for job runs
As a minimum we need to set DSODBON=1 to monitor jobs.
Set DSODBON=1 if you want to capture monitoring data
MonitorLinks 0 or 1 Controls if stage-level and link-level statistics, and references to data locators, are captured at the end of each job run.
Set MonitorLinks=0 if you do not want to capture this data is not to be captured. The default value is 0.
Set MonitorLinks=1 if you want to capture this data.
Configuration Options for System Resource Usage:
ResourceMonitor=1
ResourceNode=servername1
ResourceNode=servername2
ResourceLocalFS=Specifies a file system path whose disk mount point is to be monitored for used and free space.
ResourceRemoteFS=Specifies a file system path on a remote node whose disk mount point is to be monitored for used and free space.
Configuration Options for project monitoring data:
Configuration file
The options that are used to configure the collection of monitoring data for all jobs in all projects are set in the DSODBConfig.cfg configuration file. This system-level configuration file is stored in the /Server/DSODB directory in the installation directory.
Some of the options in the system-level configuration file can be overridden for a specific project by placing a project-level configuration file with the same name, DSODBConfig.cfg, in the project directory.
Starting and Stopping the AppWatcher Process:
Issue this command from the /InformationServer/Server/DSODB/bin directory:
DSAppWatcher.sh –start
DSAppWatcher.sh –stop
Managing the data collection processes using the DSAppWatcher.sh script
Use the DSAppWatcher.sh script to manage the data collection processes.
- -start [ AppName | all ]
- -stop [ AppName ]
- -status [ AppName ]
- -test
Starting a Specified Process:
On Unix and Linux, run DSAppWatcher.sh from the /InformationServer/Server/DSODB/bin directory.
Issue this command to restart the specified process, which is then monitored as normal by the AppWatcher process.
DSAppWatcher.sh -start AppName
AppNames:
AppWatcher
EngMonApp
ODBQueryApp
ResMonApp
Above information is also available in IBM website .
Looping in Datastage
In this article i will explain how to use datastage looping acitvities in sequencer.
I have a requirement where i need to pass file id as parameter reading from a file.In Future file id’s will increase so that i don’t have to add job or change sequencer if I take advantage of datastage looping.
Contents in the File:
1|200
2|300
3|400
I need to read the above file and pass second field as parameter to the job.I have created one parallel job with pFileID as parameter.
Step:1 Count the number of lines in the file so that we can set the upper limit in the datastage start loop activity.
sample routine to count lines in a file:
Argument : FileName(Including path)
Deffun DSRMessage(A1, A2, A3) Calling “*DataStage*DSR_MESSAGE”
Equate RoutineName To “CountLines”
Command = “wc -l”:” “:FileName:”| awk ‘{print $1}'”
Call DSLogInfo(“Executing Command To Get the Record Count “,Command)
* call support routine that executes a Shell command.
Call DSExecute(“UNIX”, Command, Output, SystemReturnCode)
* Log any and all output as an Information type log message,
* unless system’s return code indicated that an error occurred,
* when we log a slightly different Warning type message.
vOutput=convert(char(254),””,Output)
If (SystemReturnCode = 0) And (Num(vOutput)=1) Then
Call DSLogInfo(“Command Executed Successfully “,Command)
Output=convert(char(254),””,Output)
Call DSLogInfo(“Here is the Record Count In “:FileName:” = “:Output,Output)
Ans = Output
*GoTo NormalExit
End Else
Call DSLogInfo(“Error when executing command “,Command)
Call DSLogFatal(Output, RoutineName)
Ans = 1
End
Now we use startLoop.$Counter variable to get the file id by using combination of grep and awk command.
for each iteration it will get file id.
Finally the seq job looks like below.
I hope every one likes this post.
Thanks
Uma
Connector Migration Tool — IBM InfoSphere Information Server, Version 8.5
Migrating jobs to use new datastage connectors:
Connector Migration tool offers both user interface to migrate jobs and Command line to migrate jobs.
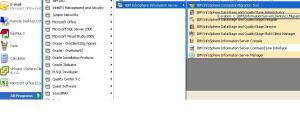
To run the Connector Migration Tool, start it from the Microsoft Windows Programsmenu or from the command line.
Using the user interface to migrate jobs
Display the jobs and stages to consider for migration
Click on View and you will see 3 options:
1)View all Jobs
2)View all migratable jobs
3)View jobs by stage types
View jobs by stage types:
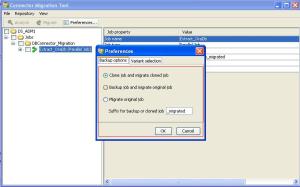
Click Preferences and choose how to migrate the job:
- Choose Clone and migrate cloned job to make a copy of the job and then migrate the copy. The original job remains intact.
- Choose Back up job and migrate original job to make a copy of the job and then migrate the original job.
- Choose Migrate original job to migrate the job without making a backup.
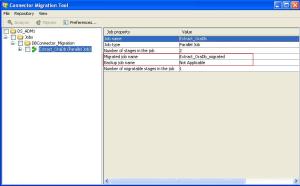
Job Before Migration:
Now select the job and click on Migrate:
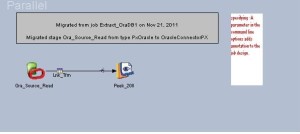
After Migration:
Known Issue with the Connector migration tool and Fix:(The below information is from official IBM website)
The SQL used in the OracleEnterpriseStage is Insert/Update,
however the
tool generated a Delete SQL.
Problem summary
-
Connector Migration Tool was not parsing the properties from the
Oracle EE stage properly. In some cases there are some leftover
properties in the stage which made the Connector Migration Tool
think the stage was in delete mode.
-
APAR number
JR39251
Using the command line to migrate jobs

1)Go to the C:\IBM\InformationServer\Clients\CCMigrationTool directory from the command line tool.
Enter the command CCMigration followed by following required parameters.
-h host:port where host and port is the hostname and port of the inforsphere datastage server.
-u username
-p password
-P project
We need to specify one of the following otherwise the user interface is displayed so that you can make additional choices for how to migrate jobs.
-M if you specify this parameter,the original jobs are migrated ,and backup jobs are not create.
-B job name extension,where job name extension is a set of alphanumeric characters and underscores.If we specify this parameter connector migration tool created backup jobs,names the backup jobs source job name + job name extension and then migrate the original jobs.
-C  job name extension, where job name extension is a set of alphanumeric characters and underscores. If you specify this parameter, the Connector Migration Tool clones the source jobs, names the cloned jobs source job name+job name extension, and then migrates the cloned jobs
Optional:
-L logfile  where log file is the file name and path for the log file that records the results of the migration.
-S stage types, where stage types is a comma-separated list of stage types. By default, the Connector Migration Tool migrates all stage types. Use this parameter to migrate only jobs that contain the specified stage types. If you specify both the -S and -J parameters, only the specified stage types within the specified jobs are migrated. If you specify the -Sparameter and do not specify the -C, -M or -B parameter, only jobs that contain the specified stage types appear in the job list that is displayed in the user interface. Limiting the jobs that are displayed can significantly reduce the startup time of the Connector Migration Tool.
- -L log file, where log file is the file name and path for the log file that records the results of the migration.
- -S stage types, where stage types is a comma-separated list of stage types. By default, the Connector Migration Tool migrates all stage types. Use this parameter to migrate only jobs that contain the specified stage types. If you specify both the -S and -J parameters, only the specified stage types within the specified jobs are migrated. If you specify the -Sparameter and do not specify the -C, -M or -B parameter, only jobs that contain the specified stage types appear in the job list that is displayed in the user interface. Limiting the jobs that are displayed can significantly reduce the startup time of the Connector Migration Tool.
- -J job names, where job names is a comma-separated list of jobs. By default, the Connector Migration Tool migrates all eligible jobs in the project. Use this parameter to migrate only specific jobs. If you specify the-J parameter and do not specify the -C, -M or -B parameter, only the specified jobs appear in the job list that is displayed in the user interface. Limiting the jobs that are displayed can significantly reduce the startup time of the Connector Migration Tool.
- -c shared container names, where shared container names is a comma-separated list of shared containers. By default, the Connector Migration Tool migrates all eligible shared containers in the project. Use this parameter to migrate only specific shared containers. If you specify the -cparameter and do not specify the -C, -M, or -B parameter, only the specified shared containers appear in the job list that displays in the user interface. Limiting the shared containers that display might significantly reduce the startup time of the Connector Migration Tool.
- -R If you specify this parameter, the Connector Migration Tool reports the details of the migration that would occur if the specified jobs were migrated, but does not perform an actual migration. The details are reported in the log file that is specified by using the -L parameter.
- -A If you specify this parameter, the Connector Migration Tool adds an annotation to the job design. The annotation describes the stages that were migrated, the job from which the stages were migrated, and the date of the migration.
- -djob dump file, where job dump file is the file name and path for a file where a list of jobs, shared containers, and stages is written. Using a job dump file is helpful when you want to determine which jobs are suitable for migration. You can use the -d parameter with the -J, -c, and -S parameters to list particular jobs, shared containers, and stage types, respectively.
Example:
Scenario1 :
Migrate orignal job:
CCMigration -h sandbox:9080 -u dsadm -p password -P DS_ADM1 -J Extract_OraDb1 -M -L C:\Extract_OraDb1.log -A
Connector Migration Tool
Licensed Materials – Property of IBM. 5724-Q36. (c) Copyright IBM Corp. 2008, 20
10. All Rights Reserved.
Migration status will be written to log file C:\Extract_OraDb1.log
Content in the log file;
Mon Nov 21 22:54:06 PST 2011 INFO Adding migration specifications
Mon Nov 21 22:54:09 PST 2011 INFO Processing migration specifications for stage type DSDB2
Mon Nov 21 22:54:09 PST 2011 INFO Getting connector descriptor for stage type DB2Connector
Mon Nov 21 22:54:09 PST 2011 INFO Processing migration specifications for stage type DSDB2PX
Mon Nov 21 22:54:09 PST 2011 INFO Getting connector descriptor for stage type DB2ConnectorPX
Mon Nov 21 22:54:09 PST 2011 INFO Processing migration specifications for stage type UDBLoad
Mon Nov 21 22:54:09 PST 2011 INFO Processing migration specifications for stage type UDBLoadPX
Mon Nov 21 22:54:09 PST 2011 INFO Processing migration specifications for stage type PxDB2
Mon Nov 21 22:54:09 PST 2011 INFO Processing migration specifications for stage type MQRead
Mon Nov 21 22:54:09 PST 2011 INFO Stage type MQRead is not installed and will be ignored
Mon Nov 21 22:54:09 PST 2011 INFO Processing migration specifications for stage type PxUnitOfWork
Mon Nov 21 22:54:09 PST 2011 INFO Stage type PxUnitOfWork is not installed and will be ignored
Mon Nov 21 22:54:09 PST 2011 INFO Processing migration specifications for stage type CODBCStage
Mon Nov 21 22:54:09 PST 2011 INFO Getting connector descriptor for stage type ODBCConnector
Mon Nov 21 22:54:09 PST 2011 INFO Processing migration specifications for stage type PxOdbc
Mon Nov 21 22:54:09 PST 2011 INFO Getting connector descriptor for stage type ODBCConnectorPX
Mon Nov 21 22:54:09 PST 2011 INFO Processing migration specifications for stage type PxOracle
Mon Nov 21 22:54:10 PST 2011 INFO Getting connector descriptor for stage type OracleConnectorPX
Mon Nov 21 22:54:10 PST 2011 INFO Processing migration specifications for stage type ORAOCIBL
Mon Nov 21 22:54:10 PST 2011 INFO Getting connector descriptor for stage type OracleConnector
Mon Nov 21 22:54:10 PST 2011 INFO Processing migration specifications for stage type ORAOCIBLPX
Mon Nov 21 22:54:10 PST 2011 INFO Processing migration specifications for stage type ORAOCI9
Mon Nov 21 22:54:10 PST 2011 INFO Processing migration specifications for stage type PxTeradata
Mon Nov 21 22:54:10 PST 2011 INFO Getting connector descriptor for stage type TeradataConnectorPX
Mon Nov 21 22:54:10 PST 2011 INFO Processing migration specifications for stage type Teradata
Mon Nov 21 22:54:10 PST 2011 INFO Getting connector descriptor for stage type TeradataConnector
Mon Nov 21 22:54:10 PST 2011 INFO Processing migration specifications for stage type TeradataPX
Mon Nov 21 22:54:10 PST 2011 INFO Processing migration specifications for stage type Terabulk
Mon Nov 21 22:54:10 PST 2011 INFO Processing migration specifications for stage type TerabulkPX
Mon Nov 21 22:54:10 PST 2011 INFO Processing migration specifications for stage type TDMLoad
Mon Nov 21 22:54:10 PST 2011 INFO Processing migration specifications for stage type TDMLoadPX
Mon Nov 21 22:54:10 PST 2011 INFO Processing migration specifications for stage type MQSeries
Mon Nov 21 22:54:10 PST 2011 INFO Getting connector descriptor for stage type WebSphereMQConnector
Mon Nov 21 22:54:10 PST 2011 INFO Processing migration specifications for stage type MQSeriesPX
Mon Nov 21 22:54:10 PST 2011 INFO Getting connector descriptor for stage type WebSphereMQConnectorPX
Thanks
Uma
Infosphere Information Server Datastage 8.5 Grid Environment
In this article we will see important datastage grid and scheduler(Loadleveler) configuration parameters to run datastage jobs in linux grid environment.
Grid deployment
Grid computing can improve the ability of any IT organization to maximize resource value. Information integration solutions that are built on grid technology can increase computing capacity at a lower cost.
Step1)Choosing clustered file system
In the grid environment, compute nodes access IBM Information Server and other libraries such as Workload Scheduler LoadLeveler on the front node through shared file system
Available clustered file systems:
1)GPFS
2)NFS
3)GFS
4)OCFS2
Step2)Resource manager software
Datastage grid supported resource manager softwares.
Resource Manager selection List:
Condor, DataSynapse, LoadLeveler, LSF, PBSPro, SGE, Torque, or SMP:
Review key files :
In this article I will explain LoadLeveler config files and parameters need to set to run datastage job.
LoadL_config file :
Sample :
#
# Machine Description
#
ARCH = AMD64#
# Specify LoadLeveler Administrators here:
#
LOADL_ADMIN = loadl dsadm#
# Default to starting LoadLeveler daemons when requested
#
START_DAEMONS = TRUE#
# Machine authentication
#
# If TRUE, only connections from machines in the ADMIN_LIST are accepted.
# If FALSE, connections from any machine are accepted. Default if not
# specified is FALSE.
#
MACHINE_AUTHENTICATE = FALSE#
# Specify which daemons run on each node
#
SCHEDD_RUNS_HERE = True
STARTD_RUNS_HERE = True#
# Specify information for backup daemons (central manager, resource manager and region manager)
#
# FAILOVER_HEARTBEAT_INTERVAL = 300
# FAILOVER_HEARTBEAT_RETRIES = 6#
#RSH Command
LL_RSH_COMMAND = /usr/bin/ssh
LoadL_admin file:
Modify the Loadl_admin file in the /home/loadl directory by adding the host
names of the compute nodesFor each of the compute nodes, the central_manager is set to false and schedd_host is set to false
#############################################################################
# MACHINE STANZAS:
# These are the machine stanzas; the first machine is defined as
# the central manager. mach1:, mach2:, etc. are machine name labels –
# revise these placeholder labels with the names of the machines in the
# pool, and specify any schedd_host and submit_only keywords and values
# (true or false), if required.
#############################################################################
conductor.example.com: type = machine central_manager = true schedd_host = true
compute1.example.com: type = machine central_manager = false schedd_host = false
compute2.example.com: type = machine central_manager = false schedd_host = false
compute3.example.com: type = machine central_manager = false schedd_host = false
compute4.example.com: type = machine central_manager = false schedd_host = false
LoadL_config.local file on conductor node:
Modify the LoadL_config.local file in the /home/loadl directory to prevent jobs from running on the front end node. Change the MAX_STARTERS value to 0 as shown like below.
#
# file: LoadL_config.local
# Statements included here override on a PER MACHINE BASIS the statements in
# LoadL_config and may be used to tailor each machine individually.
# See samples in your RELEASEDIR/samples directory
#
START_DAEMONS = TRUE
MAX_STARTERS = 0# Alternative ways of specifying the CLASS keyword
# the following is the old-style specification
#
#CLASS = { “small” “small” “small” “small” “small” “small” “small” “small” “medium” “medium” “medium” “medium” “medium” “large” “large” }
# while the following is a newer, more concise specification
CLASS = small(8) medium(5) large(2) No_Class(1) dsjob(2)
LoadL_config.local file on compute nodes.
#
# file: LoadL_config.local
# Statements included here override on a PER MACHINE BASIS the statements in
# LoadL_config and may be used to tailor each machine individually.
# See samples in your RELEASEDIR/samples directory
#
START_DAEMONS = TRUE
MAX_STARTERS = 1# Alternative ways of specifying the CLASS keyword
# the following is the old-style specification
#
#CLASS = { “small” “small” “small” “small” “small” “small” “small” “small” “medium” “medium” “medium” “medium” “medium” “large” “large” }
# while the following is a newer, more concise specification
CLASS = dsjob(2)
Loadleveler important commands for job queue status :
1)llstatus
llstatus
Name Schedd InQ Act Startd Run LdAvg Idle Arch OpSys
conductor.example.com Avail 0 0 None 0 0.15 68 AMD64 Linux2
compute1.example.com Avail 0 0 Idle 0 0.03 3 AMD64 Linux2
compute2.example.com Avail 0 0 Idle 0 0.10 9999 AMD64 Linux2
compute3.example.com Avail 0 0 Idle 0 0.05 9999 AMD64 Linux2
compute4.example.com Avail 0 0 Idle 0 0.17 9999 AMD64 Linux2
AMD64/Linux2 5 machines 0 jobs 0 running tasks
Total Machines 5 machines 0 jobs 0 running tasks
The Central Manager is defined on conductor.example.com
The BACKFILL scheduler is in use
All machines on the machine_list are present.
2)llq
llq
Id Owner Submitted ST PRI Class Running On
———————— ———- ———– — — ———— ———–
conductor.137.0 dsadm 8/20 17:46 R 50 dsjob compute1
1 job step(s) in queue, 0 waiting, 0 pending, 1 running, 0 held, 0 preempted
llctl -H
llctl: Usage: llctl [-?] [-H] [-v] [-q] [-g | -h <hostname>] <keyword>
-H means “display usage”
-v means “display command version”
-q means “display error messages only”
-g means “send command to all machines in the cluster”
-h means “send command to <hostname>”Where <keyword> is one of
“version”
“start [drained]”
“stop”
“recycle”
“reconfig”
“dumplogs”
“flush”
“suspend”
“drain [schedd | startd [<classlist> | allclasses]]”
“resume [schedd | startd [<classlist> | allclasses]]”
“purge <machinelist>”
“capture <eventname>”
“ckconfig”
“rmshm”llhold -H
llhold: Usage: llhold { -? | -H | -v | [-q] [-s] [-r] [-X <cluster_name>] [-u <userlist>] [-h <hostlist>] [<joblist>] }Options:
-? Provides a short usage message.
-H Provides extended help information.
-v Outputs the name of the command, release number, service level,
service level date, and operating system used to build the command.-q Specifies quiet mode: print no messages other than error messages.
-s Puts job(s) in system hold. Only a LoadLeveler administrator
can use this option.-r Releases job(s) from hold. If a job is in both system and user
hold, the command has to be executed twice to release the job
from hold. Once to release the job from system hold, and once
to release the job from user hold. Only a LoadLeveler
administrator can release a job from system hold.-X cluster_name
Specifies a remote cluster that will perform the request for a remote command.
-u userlist
Is a blank-delimited list of users. When used with the -h
option, only the user’s jobs monitored on the machines in the
host list are held or released. When used alone, only
the user’s jobs monitored by the machine issuing the command
are held or released.-h hostlist
Is a blank-delimited list of machine names. All jobs monitored
on machines in this list are held or released. When issued
with the -u option, the user list is used to further select jobs
for holding or releasing.joblist
Is a blank-delimited list of jobs of the form host.jobid.stepid .
host : the name of machine to which the job was submitted.
The default is the local machine.
jobid : the job ID assigned to the job when it was submitted
using the llsubmit command. jobid is required.
stepid : the step ID assigned to the job when it was submitted
using the llsubmit command. The default is to include
all the steps of the job.
Step3)Installing and configuring Grid Enablement Toolkit provided by IBM
The Grid Enablement Toolkit is a set of processes and templates that allows you to execute jobs in the grid environment infrastructure.
Once the Grid Enablement Toolkit is installed successfully in the APT_ORCHHOME dir below are the important files we will use in grid env configuration for each datastage project.
grid_global_values file sample
# Grid Engine, review supported Resource Managers for valid values
Engine=LoadLeveler
# Add this to the PATH, SOURCE this script and/or SET and export this value
PATH=/home/loadl/bin
SOURCE=
SET=
# Maximum nodes a job can have
MaxNodesPerJob=4
# ViewDataNodes = Max number of nodes for view data
ViewDataNodes=4
# ViewDataPartitions = Number of partitions per node for view data
ViewDataPartitions=2
# List of valid Queues/classes that can be used for job submission
ValidQueues=Dsbatch small medium large
# If APT_GRID_QUEUE is not defined, use this value (can be blank for no queue)
DefaultQueue=dsjob
# List of aliases for the conductor node. Prevents using static config files
ConductorAKA=localhost
# Default Grid job directory (work file location)
JOBDIR=/sharedfilesystem/gridjobdir
# Pre 4.0 release format for node names (If yes node names are X_Y otherwise Z
# where X is physical server, Y = partition or Z = simple format
OldFormatStyle=No
# TotalPartitionsRule is used to identify how to create the APT_CONFIG_FILE
# if the number of nodes returned by the Resource Manger is less than what
# was requested. If OldFormatStyle=Yes, this feature is ignored and the
# processing is based on “read_only”. Valid values are: Truncate, DupLast,
# RoundRobin, read_only or cores. The default is read_only.
TotalPartitionsRule=cores
# Scratch disk allocation:
# Default is “single” scratch disk per partition, if more than 1 defined, they
# are round robined for each partition. A value of “all” indicates the resources
# defined in the grid_config.apt configuration file are assigned to all partitions
# (the starting resource is rotated across the partitions).
ScratchDisk=single
# Resouce disk allocation:
# Default is “all”, which indicates the resources defined in the grid_config.apt
# configuration file are assigned to all partitions (the starting resource is
# rotated across the partitions). A value of “single” assigns a single resource disk
# per partition, if more than 1 defined (resource disks are round robined for each
# partition).
ResourceDisk=all
# Allow jobs to run on Conductor node only (Project overrides)
ConductorOnly=No
Parameter 1 :
MaxNodesPerJob : this parameter defined max compute nodes will be use to run datastage job across all the projects on that server.
If we have 20 node in the grid then we will defined this as 20.If we defined this as 20 and if we have 10 projects on the same server and if one developer assigns all 20 nodes then the othere project will suffer due to lack of resources.
dsadm will define max nodes used per job by copying this file from grid dir to project specific dir with grid_project_values as file name.
Example :
# Grid Engine, review supported Resource Managers for valid values
Engine=LoadLeveler
# Add this to the PATH, SOURCE this script and/or SET and export this value
PATH=/home/loadl/bin
SOURCE=
SET=
# Maximum nodes a job can have
MaxNodesPerJob=2
# ViewDataNodes = Max number of nodes for view data
ViewDataNodes=2
# ViewDataPartitions = Number of partitions per node for view data
ViewDataPartitions=2
# List of valid Queues/classes that can be used for job submission
ValidQueues=Dsbatch small medium large
# If APT_GRID_QUEUE is not defined, use this value (can be blank for no queue)
DefaultQueue=dsjob
# List of aliases for the conductor node. Prevents using static config files
ConductorAKA=localhost
# Default Grid job directory (work file location)
JOBDIR=/sharedfilesystem/gridjobdir
# Pre 4.0 release format for node names (If yes node names are X_Y otherwise Z
# where X is physical server, Y = partition or Z = simple format
OldFormatStyle=No
# TotalPartitionsRule is used to identify how to create the APT_CONFIG_FILE
# if the number of nodes returned by the Resource Manger is less than what
# was requested. If OldFormatStyle=Yes, this feature is ignored and the
# processing is based on “read_only”. Valid values are: Truncate, DupLast,
# RoundRobin, read_only or cores. The default is read_only.
TotalPartitionsRule=cores
# Scratch disk allocation:
# Default is “single” scratch disk per partition, if more than 1 defined, they
# are round robined for each partition. A value of “all” indicates the resources
# defined in the grid_config.apt configuration file are assigned to all partitions
# (the starting resource is rotated across the partitions).
ScratchDisk=single
# Resouce disk allocation:
# Default is “all”, which indicates the resources defined in the grid_config.apt
# configuration file are assigned to all partitions (the starting resource is
# rotated across the partitions). A value of “single” assigns a single resource disk
# per partition, if more than 1 defined (resource disks are round robined for each
# partition).
ResourceDisk=all
# Allow jobs to run on Conductor node only (Project overrides)
ConductorOnly=No
In the above example we defined MaxNodesPerJob=2 and hence for this project we can only use 2 physical nodes perjob.If we define APT_GRID_COMPUTENODES=3 then the job will fail with the following error.
<Dynamic_grid.sh> Value of APT_GRID_COMPUTENODES is greater than MaxNodesPerJob (2}
2)grid_config.apt
{
node “Conductor”
{
fastname “computenode.example.com”
pools “conductor”
resource disk “/sharedfilesystem/tempfile” {pools “”}
resource scratchdisk “/tmp” {pools “”}
}
node “$$Compute”
{
fastname “$$fastname”
pools “”
resource disk “/sharedfilesystem/tempfile” {pools “”}
resource scratchdisk “/tmp” {pools “”}
}
}
Now copy this file to project directory and make changes according to the project directory structure.
{
node “Conductor”
{
fastname “computenode.example.com”
pools “conductor”
resource disk “/sharedfilesystem/tempfile” {pools “”}
resource scratchdisk “/sharedtmpfilesystem/projdir” {pools “”}
}
node “$$Compute”
{
fastname “$$fastname”
pools “”
resource disk “/sharedfilesystem/tempfile” {pools “”}
resource scratchdisk “/sharedtmpfilesystem/projdir” {pools “”}
}
}
If we don’t create above file in the project dir then the jobs in that particulr project use global values defined in the grid_global_values and grid_config.apt file.
Toolkit environment variables
For 8.x applications, the toolkit environment variables are set using the DSParams file which is updated during installation.
Each project within IBM Information Server is modified to include the grid-related environment variables as shown in below figure. These are defined as project level defaults and can be added or changed at the job level.
A brief summary of the grid environment variables follows:
$APT_GRID_COMPUTENODES:
Specifies the number of compute nodes required for this job.
$APT_GRID_CONFIG
Specifies the path name to the template $APT_CONFIG_FILE file that must be used for a given job run. The default is to use the project’s grid_config.apt configuration file. If such a file does not exist in the project directory, then the global grid_config.apt configuration file is used.Setting this parameter defines the template file to use for this job run.
$APT_GRID_ENABLE:Possible values YES or NO
(Y)es indicates that a new configuration file will be created dynamically based on other parameters such as $APT_GRID_COMPUTENODES and $APT_GRID_PARTITIONS. – (N)o indicates that a defined configuration file is available and will be used. This is the default.
$APT_GRID_IDENTIFIER
Setting this overrides the actual job name when submitted to the resource manager.
$APT_GRID_OPTS
Additional options may be supplied to the Grid engine to request resources.Node resource parameters must not be included here, as these are requested using the environment variable $APT_GRID_COMPUTENODES. These parameters are based on a specific resource manager and are not translated.
$APT_GRID_PARTITIONS
Specifies the number of partitions for each compute node. The default is 1 partition per compute node.
$APT_GRID_QUEUE
The name of the resource manager queue to which a job is submitted. The
default is blank or undefined.
Queues are used to separate jobs on the basis of priority:
– High
– Medium
– Low
– Special processing
Each queue typically has different resources available to run jobs.
$APT_GRID_SCRIPTPOST
Name of an executable script that gets run after the DataStage job finishes processing data, but before the job completes. The script is run on the node that the configuration file was created on.
$APT_GRID_SCRIPTPRE
Name of a script that can be executed after the resource manager has allocated the desired nodes, but before the actual DataStage job starts processing. This script is run on the node that creates the configuration file.
$APT_GRID_SEQFILE_HOST
Has the host name set by the Dynamic_grid.sh based on the first node returned by the resource manger. It is used as a job parameter in DataStage and QualityStage jobs to provide sequential file I/O on files.
Example usage when defining path name:
#$APT_GRID_SEQFILE_HOST#/home/dsadm/Ascential/DataStage/Datasets/Sto
reList.txt
When used as shown, “hostname:” is returned. The colon is included in the
value returned.
$APT_GRID_SEQFILE_HOST2
Has the host name set by Dynamic_grid.sh based on the second node
returned by the resource manger. Similar to $APT_GRID_SEQFILE_HOST. It
has the first host name if only one host name is returned by the resource
manager.
$APT_GRID_STAT_CMD
Setting this parameter to an operating system level monitoring command allows the output to be captured on the first compute node returned by the resource manager. This parameter is useful when trying to determine how the first compute node is performing during a job run. For example, the command sar 5 1000 runs sar every five seconds for 1000 times, or until the job ends (the last step before the job ends on the compute kills this process). The suffix of the file containing the output of this command is statcmd. The file is located in the <JOBDIR> as the <JOBNAME>_PID.statcmd.
Note :The above parameter explanation was taken from IBM datastage red book
Disable autostart on server reboot for datastage engine and metadata tier
Disable Engine Autostart:
Log on to datastage engine server as root and execute the following command.
cd $DSHOME
Step1)Source the dsenv file
. ./dsenv
cd scripts
execute following script to disable autostart up
./DSEdisable_autostartup.sh
Disable DB2 Autostart:
cd /ibm/db2/V9/bin
db2iauto -off db2inst1
Ganglia — installation on red hat enterprise linux
Install following rpms using yum
[root@ip-10-111-51-54:/etc] rpm -qa | grep ganglia
ganglia-gmetad-3.0.7-1.el5
ganglia-3.0.7-1.el5
ganglia-3.0.7-1.el5
ganglia-web-3.0.7-1.el5
ganglia-gmond-3.0.7-1.el5
yum install ganglia ganglia-gmetad ganglia-gmond ganglia-web
sudo /usr/bin/passwd ganglia
/sbin/chkconfig --levels 345 gmond on
[root@ip-10-111-51-54:/etc] /sbin/service gmond start
Starting GANGLIA gmond: [ OK ]
/sbin/chkconfig --levels 345 gmetad on
[root@ip-10-111-51-54:/etc] /sbin/service gmetad start
Starting GANGLIA gmetad: [ OK ]
/usr/sbin/usermod -G apache -a ganglia
[root@ip-10-111-51-54:/etc] /etc/init.d/httpd restart
Stopping httpd: [ OK ]
Starting httpd: [ OK ]
You can view ganglia with this url:
IBM InfoSphere 8.5 fixpack 1 — new features
IBM has released Fix Pack for Information Server 8.5,please below links for details
Announcement:
https://www-304.ibm.com/support/docview.wss?mynp=OCSSX3EG&mync=E&uid=swg27018354&myns=swgimgmt
Download instructions
https://www-304.ibm.com/support/docview.wss?uid=swg21443006
Fix List
https://www-304.ibm.com/support/docview.wss?uid=swg21468662
These stages have been included in the Fix Pack to streamline applying these features into your environment.
XML Stage,CDC Transaction Stage,DRS Connector
Here are a few of the new features packaged into DataStage as part of FP1:

NEW – Job Log Detail Window in Designer
The Director’s Log Detail window has been integrated into Designer (see picture to right). With this enhancement, users can access the full set of job runtime information directly alongside their job design, thus simplifying the development lifecycle. You will also note that additional job control buttons (job stop/job reset) are provided in the log toolbar.NEW – Bloom Filter Stage
The Bloom Filter stage is based on the algorithm developed by Burton Howard Bloom and provides highly performant and resource efficient duplicate key filtering. This is particularly useful in Telco data integration patterns involving the enormous volumes of call detail records.

NEW – Environment Variable Import/Export Features
The DataStage Administrator includes two new buttons that control the export and import of environment variables. These files can be shared between projects in the same Information Server instance or across mulitple instances as you may require in promoting from dev to test to prod. This feature ensures that customizations made to one project’s runtime environment can be applied consistantly across your enterprise.
